FabFilter Pro-L 2 online help
Table of contents
Go to sectionFabFilter Pro-L 2 Help
Introduction
Using FabFilter Pro-L 2
Full Screen mode, resizing and scaling
Presets
Purchasing FabFilter Pro-L 2
Support
Metering
Accurate metering is extremely important in a limiter plug-in. To give you a perfect view of what's happening to your audio, FabFilter Pro-L 2 offers very accurate output and gain change meters, including a textual representation of maximum peak levels, as well as a large real-time level display, showing levels and limiting over time.

Using the Meter Scale button, you can choose between three normal scales and three K-Metering scales, as well as a dedicated Loudness scale for loudness metering.
Normal metering scales
 |
FabFilter Pro-L 2 has three normal metering scales. All three general scales have linear precision in the upper part of the metering, offering the best precision where limiting mostly happens:
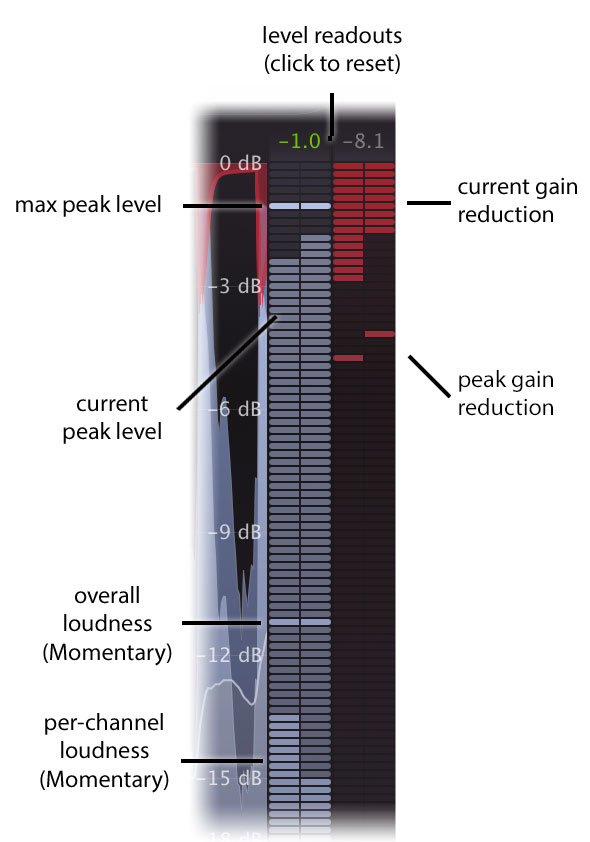
Like the K-System meters described below, the normal output meter shows the RMS level and the peak level at the same time. The RMS level follows the Momentary specification of the EBU R128 standard, and is shown per-channel and also as a combined level for all channels. Above the meters, the maximum peak output level and gain reduction is displayed. The peak level is shown in green if True Peak Metering is enabled (see below). Click on the level text to reset the reading. |
K-System metering scales
The K-System, introduced by mastering engineer Bob Katz in 1999, is a protocol for setting mix and monitor calibrations in a studio environment. Although loudness standards like EBU R128 are more widely used nowadays, the K-System is still a useful way to regulate audio levels. It uses three separate standards known as K-20, K-14, and K-12. With each step (from K-20 to K-12), the available dynamic range decreases as the average level increases. The top label of the meter scale indicates the maximum head-room (either 20dB, 14dB or 12dB), and just as with normal metering this matches the full-scale digital signal. Your monitor gain should be calibrated carefully, so that the level at the 0 dB label of the meter matches 85 dBC SPL.
The K-System meters show both peak and RMS level at the same time. The top red zone of the meters is the loud or fortissimo zone. In music recording, the RMS level should only reach the red zone in the loudest passages, climaxes or occasional peak moments. If you find yourself using the red zone all the time, you might want to check whether your monitor gain is properly calibrated.
- K-12: This scale is intended to be used exclusively for broadcast material, be it radio or television. With this system, -12 dBFS = 0 VU = 85 dB SPL. The limited headroom of 12 dB explains its exclusiveness to heavily compressed broadcast material.
- K-14: This should be the standard for the majority of commercial recordings created for home listening. Pop music and home theatre mixes are examples of material that would fall under K-14, where -14 dBFS = 0 VU = 85 dB SPL. The available headroom is 14 dB. The K-14 scale is probably the most widely used of the three standards.
- K-20: Offering the widest available dynamic range of the three systems, this scale should be used primarily for large theatrical mixes, dynamic music mixes, and classical style mixes. Any material with a wide dynamic range should be reserved for the K-20 standard. In this system, -20 dBFS = 0 VU = 85 dB SPL and the headroom is 20 dB.
To read more about the K-System and how to use it properly (including monitor gain
calibration), read Bob Katz' article: An Integrated
Approach to Metering, Monitoring, and Levelling Practices  .
.
The real-time level display
The large real-time level display shows input level (gray / light blue), output level (dark blue), gain reduction (red) and loudness level (thin line) at the same time. Gain reduction peaks are highlighted with yellow peak level readings. The display gives you a very good insight in the amount of limiting going on, and the overal peak and average levels.

The Display Mode button selects the behavior of the real-time level display:
- Slow Down lets the display move slowly so you can easily follow the levels and the peak gain reduction labels. Once the incoming audio reaches the rightmost display edge, the display quickly scrolls back to make room for new audio.
- Fast is the behavior from Pro-L 1 where the display moves fairly quickly at a steady pace.
- Slow is the same, but with a slower pace so you can see more audio history at a time. This mode works well in combination with Short Term loudness metering.
- Infinite shows all incoming audio since the interface was opened or this mode was selected, increasing the density each time the display fills up. This mode works well in combination with Integrated loudness metering.
- Off turns the display off altogether which is useful if you find it distracting while listening.
True Peak Metering
Digital audio processing, and especially ultra-fast limiting or hard clipping in the digital domain, can introduce inter-sample peaks. In this case, when converting the digital signal back to analog, a D/A converter will generate an analog signal that is actually higher than the individual digital sample values. Peaks like these are called inter-sample peaks or true peaks. Depending on the quality of the D/A converter, these peaks can cause audible clipping and distortion.
Of course, it's always best to minimize inter-sample peaks, and at the same time make sure that any peaks in your audio, both normal or inter-sample, stay within the ceiling set by the Output knob. Then you can be sure that D/A conversion (and also other operations like MP3 conversions) do not introduce unwanted distortion.
FabFilter Pro-L 2 offers two tools to ensure this:
- True Peak Limiting guarantees that inter-sample peaks in the output signal stay under the chosen ceiling level. See True peak limiting.
- True Peak Metering lets you view inter-sample peaks in the output meter so you can verify that this works correctly.
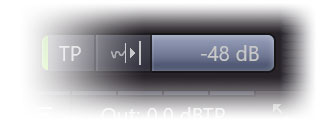
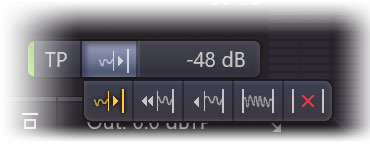
The TP button next to the meter scale button turns true peak metering on and off.

If true peak metering is enabled, the TP button displays a green light. In addition, the maximum peak level reading above the output meter is shown in green to reflect that it is a true peak level reading. It will turn orange when true peak levels exceed the current Output Level and red when exceeding 0 dBTP. We recommend to always turn on true peak metering unless you are interested in the difference between the sample peaks and the inter-sample "true" peaks.
Of course, FabFilter Pro-L 2's true peak metering system fully complies with the EBU R128 and ITU-R BS.1770 standards.
Tips:
- When skipping through presets, the current metering settings are not changed, but they are saved in sessions. In addition, any change you make is automatically saved as the default setting, used when opening a new instance of Pro-L 2.
- When using Pro-L 2 for surround/immersive audio processing, the meter section will show all channels in logical order and appropriately grouped. See Surround and Dolby Atmos.
- You can also switch to the Compact interface layout to hide the real-time display and see larger output meters. See Full Screen mode and resizing.
- Note that true peak metering isn't exact science: there are many different ways to implement ITU-R BS.1770 compliant metering, which might result in slightly different readings. Differences of 0.1 or 0.2 dBTP between different true peak meters are not unusual. Our true peak meters use high internal oversampling and have been verified with all test audio as provided by ITU itself to ensure compliance. Also, it's suitable for MFiT (Mastered for iTunes).
Next: Loudness metering
See Also
Overview
Recommended workflow
