After combining the outputs of the oscillators in the mixer, the signal arrives at the filter. There is probably no other parameter on a synthesizer that you'll use as much as the filter cut-off. This parameter has a dramatic effect on the character of your sound; from providing aggressive filter sweeps to dialing in fat bass tones or resonant pads - it is all at your fingertips with this control. In this article we'll explore some filter varieties and additional parameters that you'll find in the filter section.
Every synthesizer offers a filter section, some more elaborate than others but the filter section usually consists of at least the following parameters:
- Cut-off frequency
- Resonance
- Filter envelope
Filter Cut-off Frequency
The cut-off frequency is sometimes written as cut-off, frequency, filter or a combination of these words. This filter can come in different flavours, depending on the synth:
- Low-pass filter: cuts the highs, and makes the sound duller or warmer
- High-pass filter: cuts the lows, and makes the synthesizer sound brighter or thinner
- Band-pass filter: outputs a relatively small designated frequency area, cutting off both high’s and low’s
These filters are always subtractive, which means they only allow us to reduce the energy above or below the cut-off frequency. Usually the amount of reduction at the cut-off will be expressed in dB per octave (dB/oct), but don't be surprised if you come across terms like 2-pole, 4-pole, or amount/cut. Just remember the bigger the amount of poles or cut, the steeper the cut-off filter (2-pole = 12 dB/Oct, 4 pole = 24 dB/Oct).
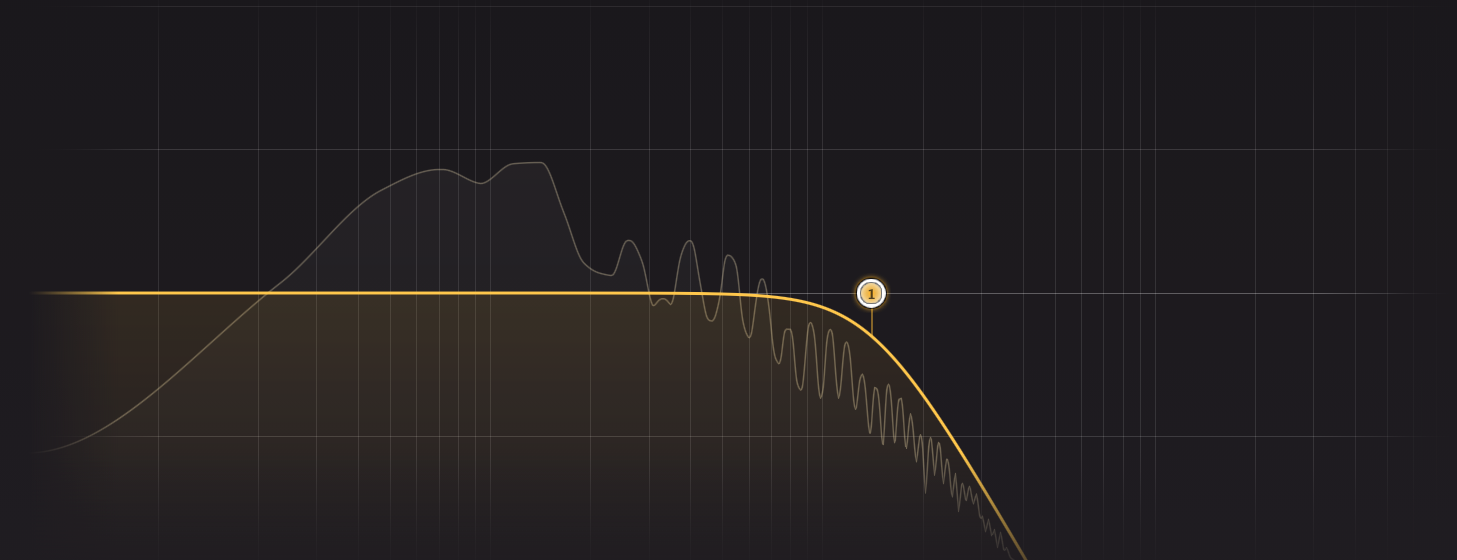
Low-pass filters
In the image above we can see what is known as a 12db per octave low-pass filter (or LP12 for short). The effect is about the same as what a low pass filter on an EQ does, except that a synthesizer's filter often brings some additional coloration to the table.
Lowering the cut-off frequency will result in less high frequencies, while a higher cut-off frequency will result in more high frequencies being preserved. With a filter set to 24 dB per octave, the effect of dulling the sound is more apparent than it would be for a 12 dB per octave filter.
Here's an example, we'll start by lowering the cut-off and then bringing it back up again. Take note of how bright, aggressive and harmonically rich the sound is to start out and how much this changes by the middle when the cut-off frequency is at its lowest point.
High-pass filters
Some synthesizers offer the option to cut the low frequencies of a sound with a high-pass filter. This can help with sounds that are too muddy for your band or mix. Again, these filters usually offer 12 or 24 decibels per octave attenuation, though 12 decibels per octave is more common for high-pass filters. The higher your high-pass cut-off frequency is, the thinner the resulting sound.
Here is an example, similar to previous one, but now we will use a high-pass filter instead of a low-pass filter. We will start with the cut-off frequency at its lowest setting, increase it and then decrease it. You should hear the sound starting full-bodied and getting thinner as the cut-off frequency increases.
Band-pass filter
Lastly, some synthesizers offer the option of a band-pass filter. This filter cuts both the low and high frequencies of a sound, leaving only a relatively small designated frequency area. One of the uses for this filter is for creating thin sounding synthesizer patches that cut through a mix without overlapping with other sounds. Another approach is to set the filter in such a way (with a center frequency of 1000 or 2000 Hertz) that the sound will take on a lo-fi character: sounding like it's coming from an old radio or speaker. What’s great about bandpass filters is that they prevent a sound from occupying too wide of a frequency range at once, leaving space for other instruments.
Here is an example using a band-pass filter, but this time, instead of sweeping the cutoff frequency (or centre frequency in this case), it is fixed at ~2kHz. You will first hear 2 bars of the full bandwidth sound (no filter), and then the filter will be engaged so you can hear the effect it has on the sound.
Resonance
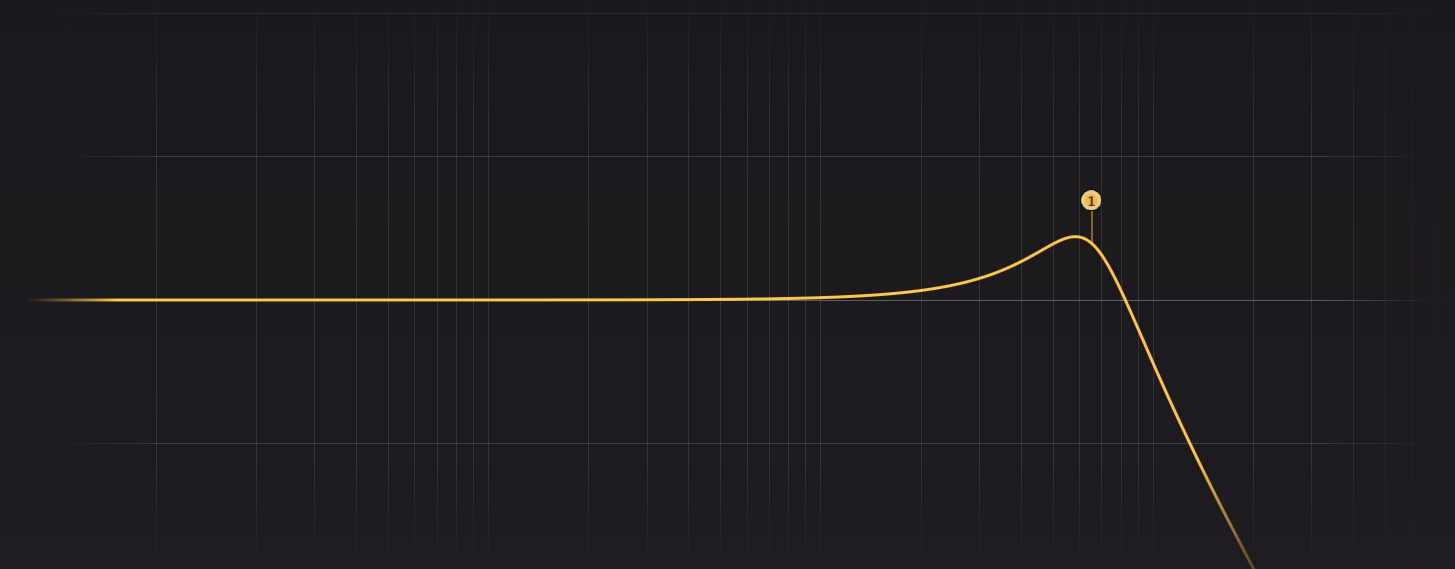
Resonance, sometimes referred to as 'peak', emphasizes the frequencies just before the filter cut-off frequency. As we can see in the image above this creates a slight boost before the frequencies are attenuated. This results in the sound being a bit duller overall, but the brightest part of our dulled sound is emphasized, drawing attention to it with some colouration. A filter sweep can become much more interesting this way.
Let's explore some examples to get an idea of what resonance does to the sound of the filter.
In this first example, we hear a basic filter sweep with a low peak value, producing no resonance.
Here, the resonance is increased slightly. Listen to how the filter draws more attention to itself now.
In this last example, the resonance is increased dramatically. Listen to the hollow sound of the filter as it sweeps through different frequencies.
As we can hear in the above examples, the higher the resonance, the more pronounced this bump becomes. Having a steeper cut-off filter slope (LP24 rather than LP12) also makes the resonance sound more pronounced. If you push the resonance high enough the filter will start to self-oscillate.
Filter envelope
Just like we use an envelope to shape the amplitude of a signal over time, we can also use an envelope to shape how the filter's cut-off frequency changes over time.
The amount of change in the filter cut-off that will take place is determined by the filter envelope amount, sometimes called the amount of contour.
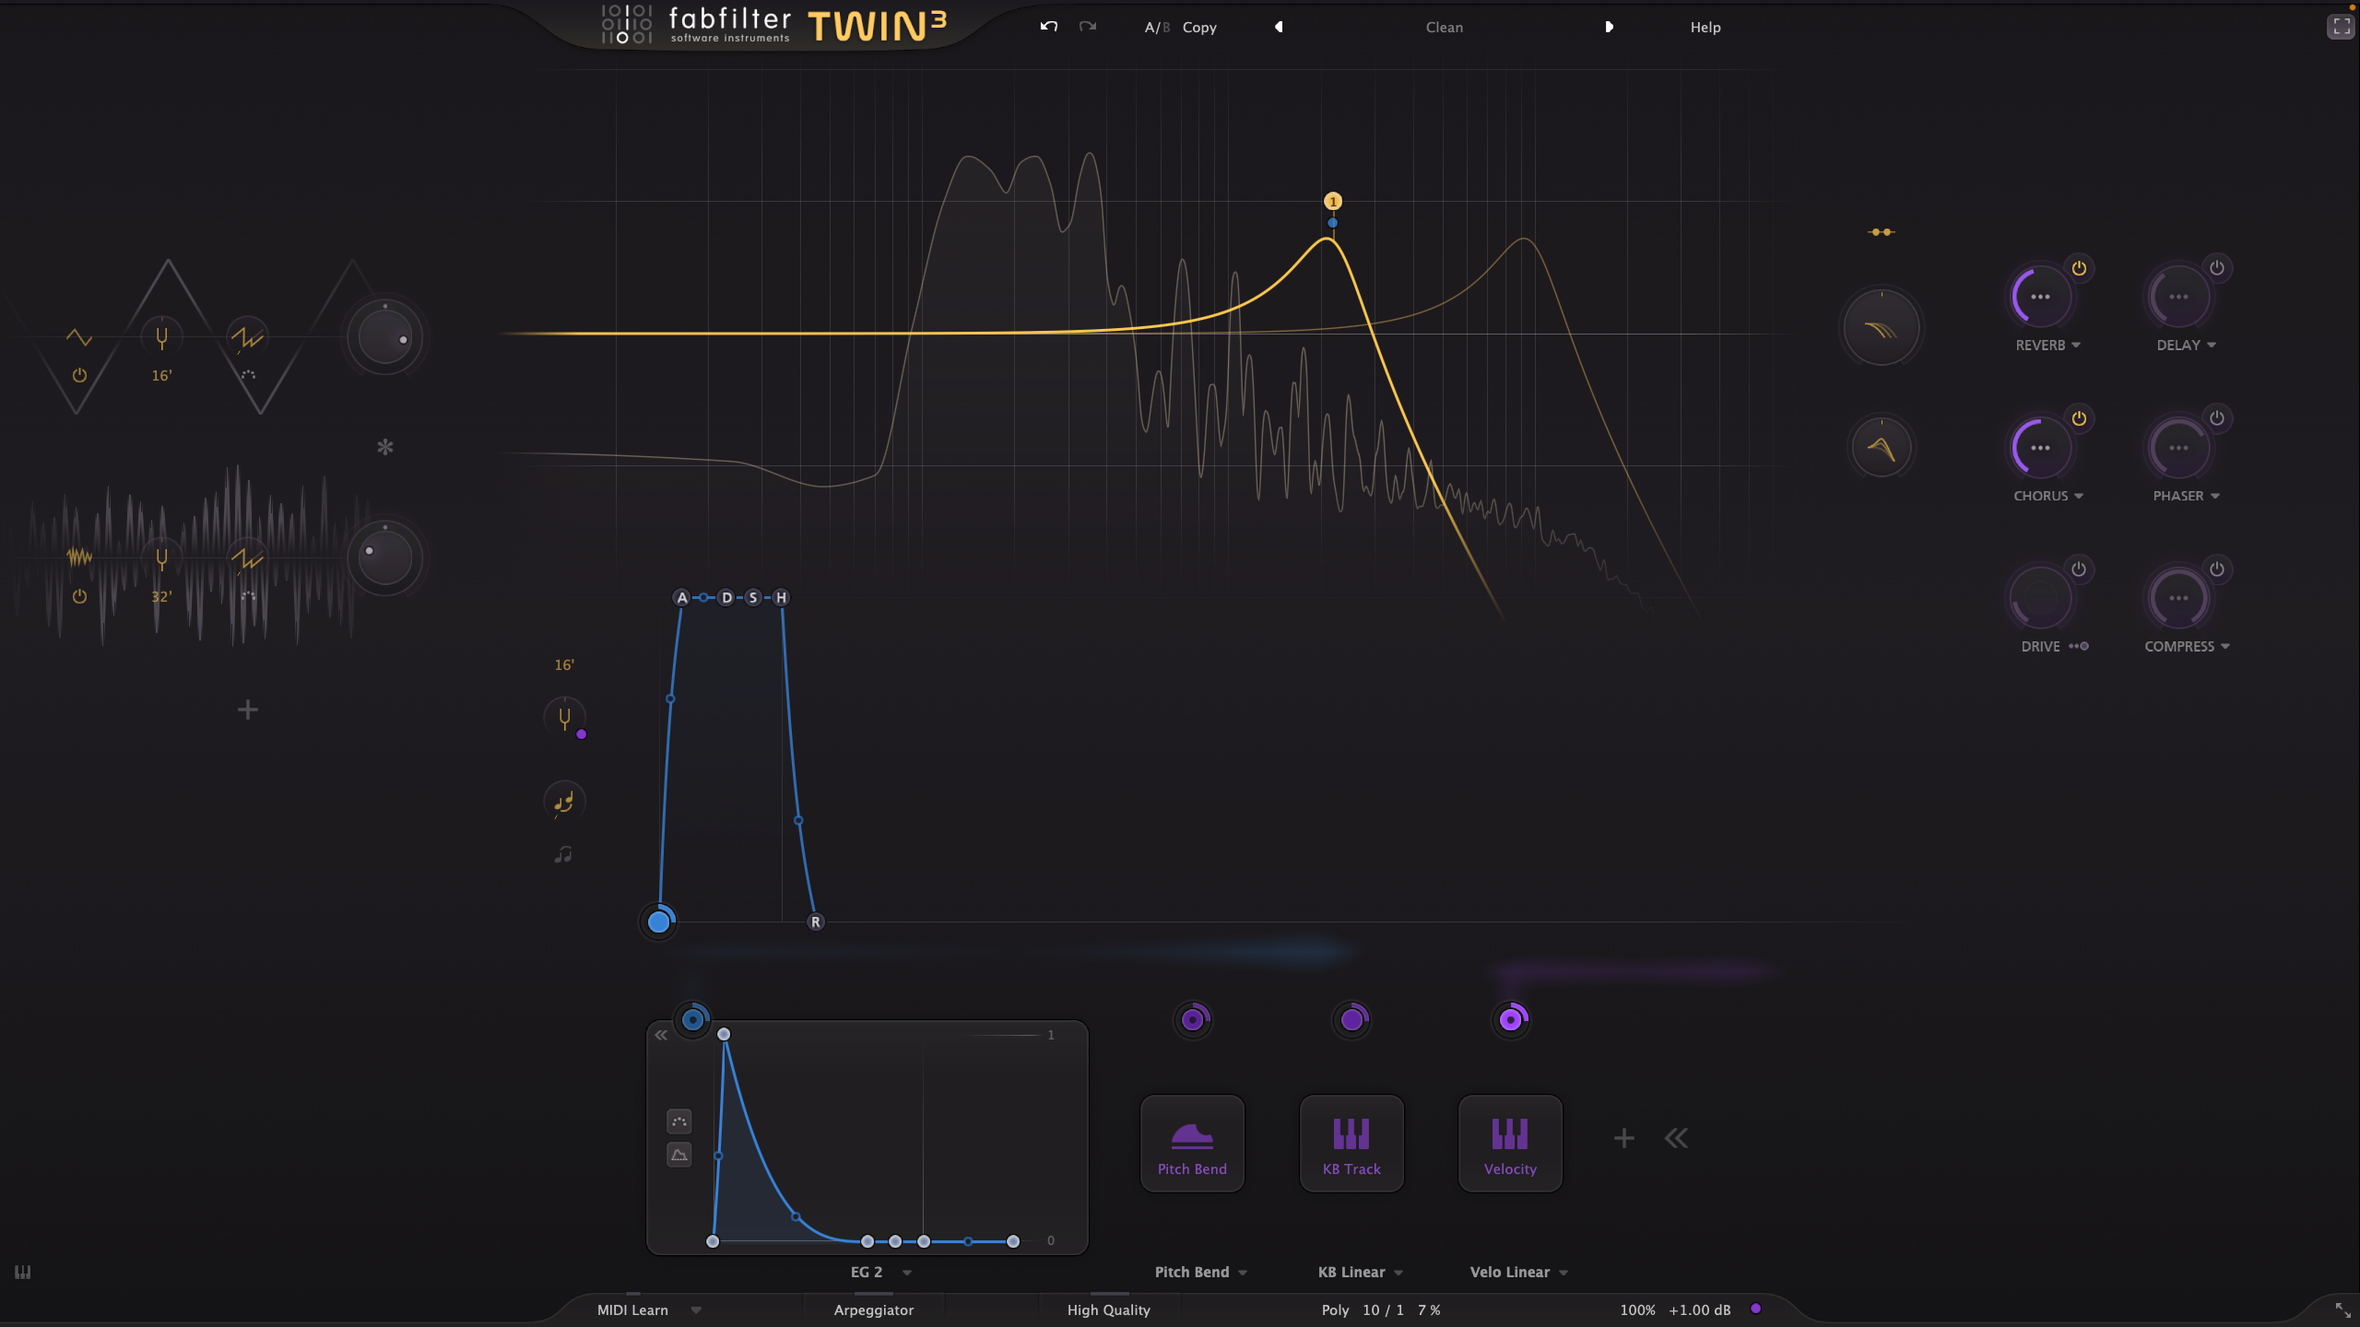
Let’s create a sound in Twin 3 to illustrate. We’ll set basic values for the oscillators, amplitude envelope and cut-off frequency to start:
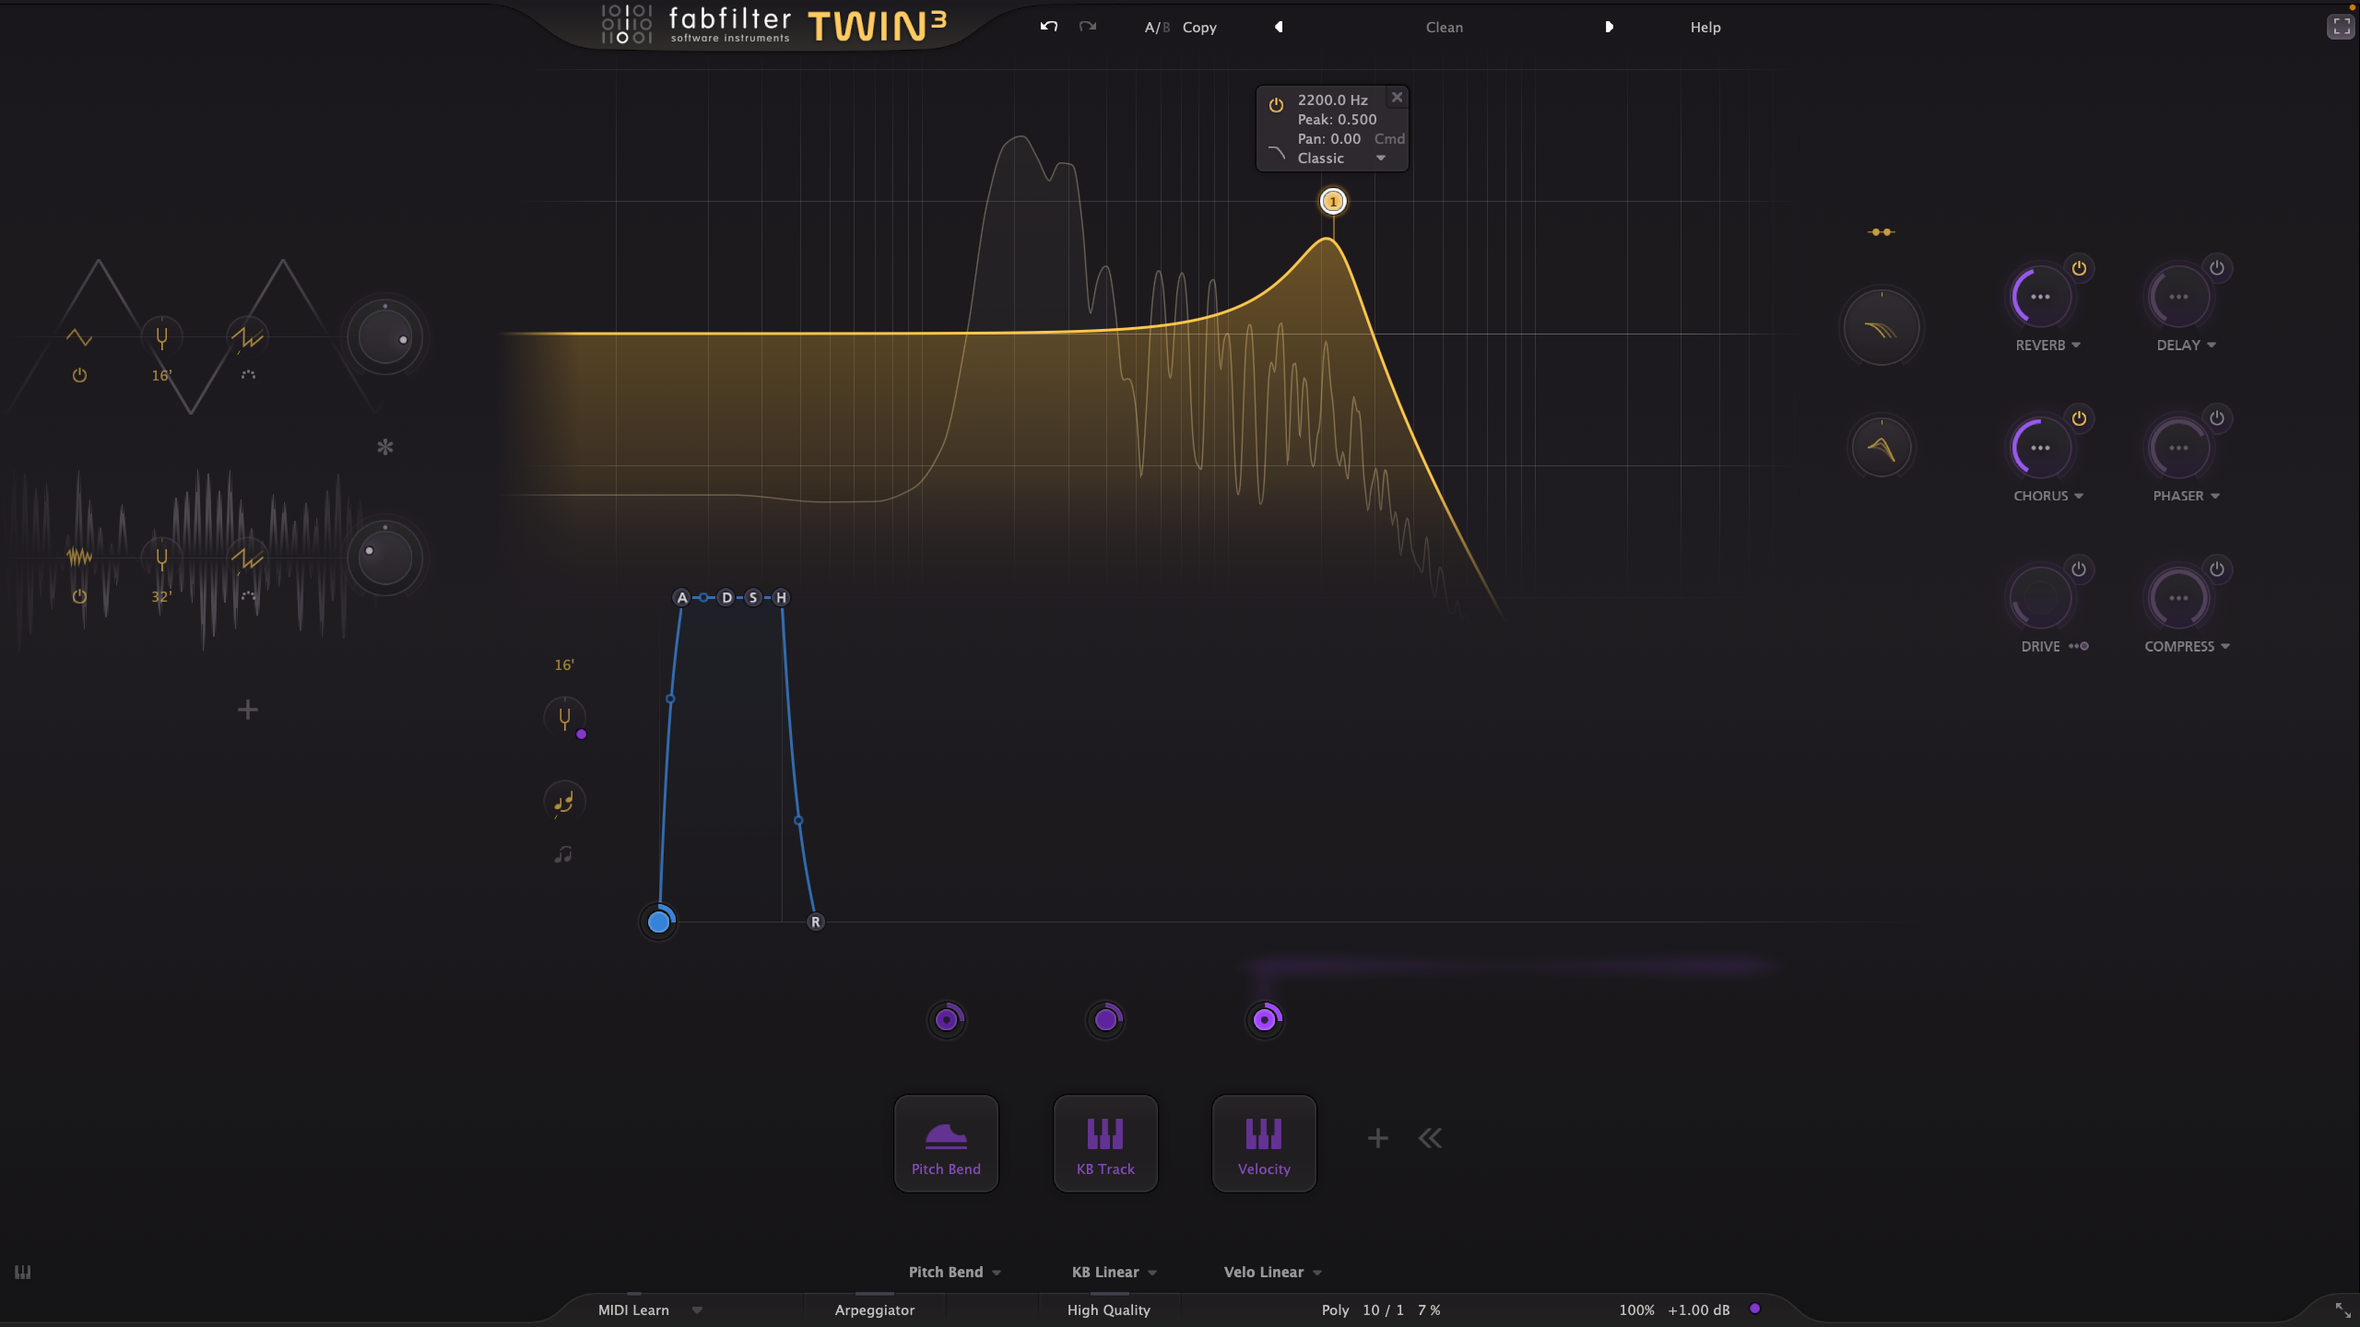
Now let’s set up the filter envelope. To do this in Twin 3, we will add an envelope generator to the modulation section. After adding the envelope generator, we will map it to the cut-off frequency we set earlier.
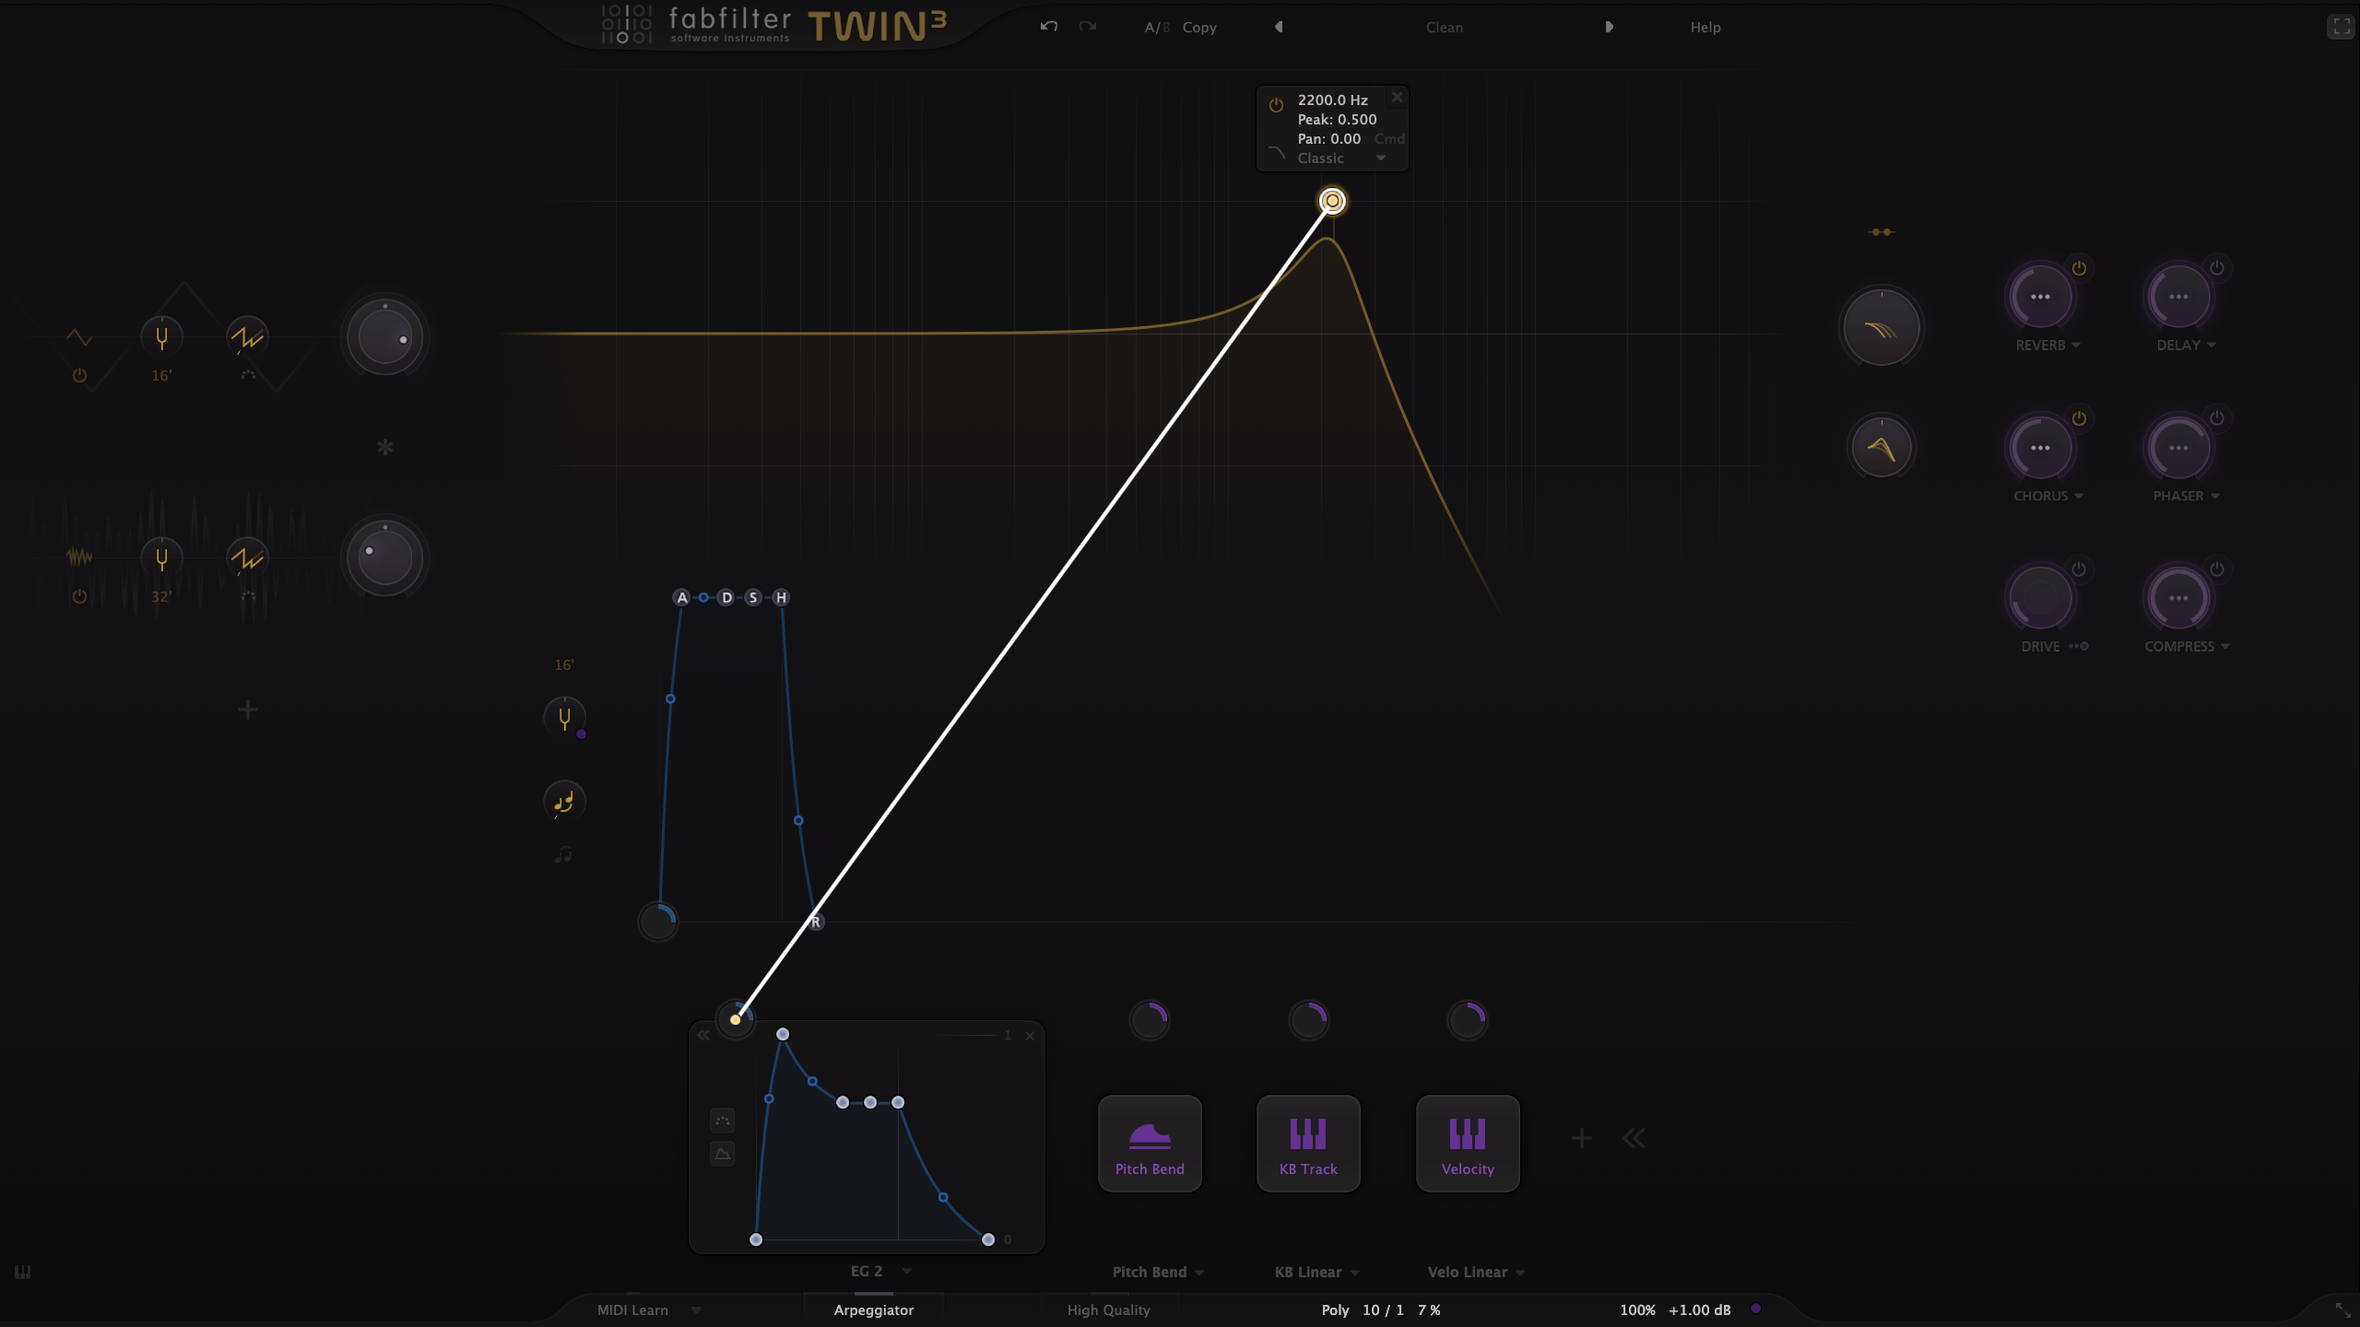
For this example, we will set the modulation level (or amount) to 1 for dramatic effect, but this could be reduced for more subtle gestures.
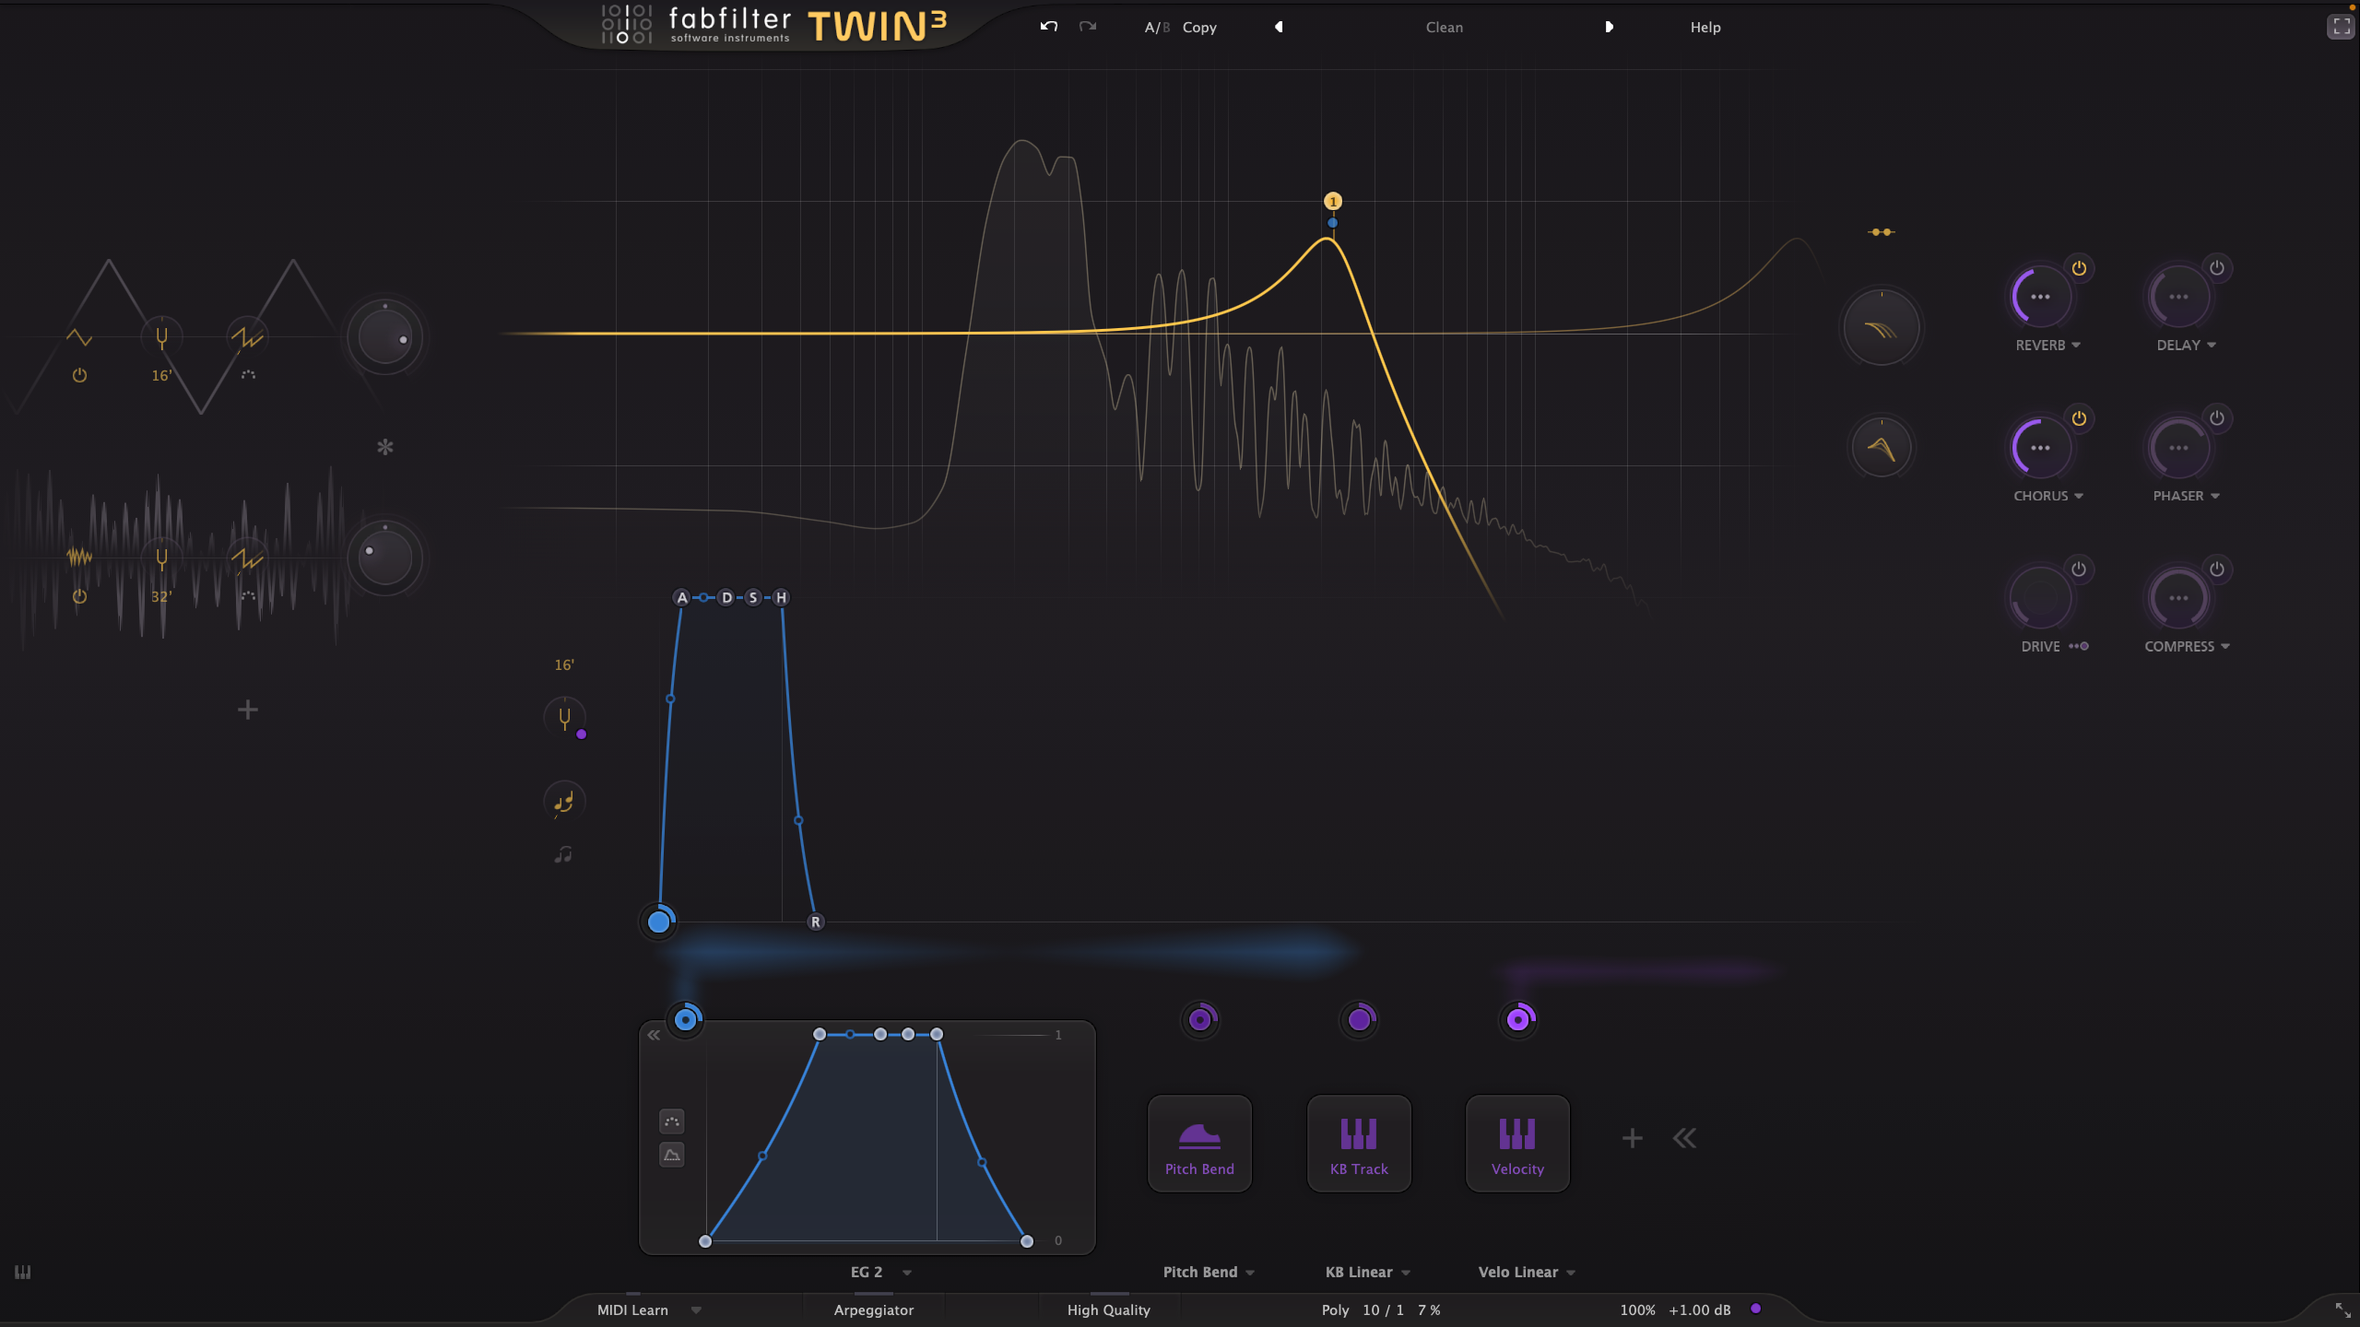
Now, when we play a note, the envelope generator that we just added (acting as a filter envelope) will affect how the filter cutoff frequency changes over the note's duration. This can be totally different from how the amplitude envelope is set.
For instance, our amplitude envelope has a short attack, which means the note arrives at full amplitude quickly after a key is pressed. In contrast, let's set the filter envelope to have a slow gradual attack (~2.5s). This means that when a note is played, the cutoff frequency will start at the value we set manually, 2200 Hz. It will then be modulated to a higher value based on the filter envelope and modulation level (the amount). The result of this is a sort of automatic filter sweep that will make the note get gradually brighter. Check out how that sounds.
We could also do the opposite. In this next example, the filter envelope is set to have a fast attack and slow decay. This results in the filter starting wide open, with the cutoff frequency being modulated down after the initial attack of the note. This produces a filter sweep in the opposite direction than our first example.